Hello and welcome~
It's been way too long since the last time I updated here, but here's one of the most interesting lil' projects I've done recently. It's a sort of kind of dragon-ish plush-doll... Thing... Scroll down and you'll see~ ;D
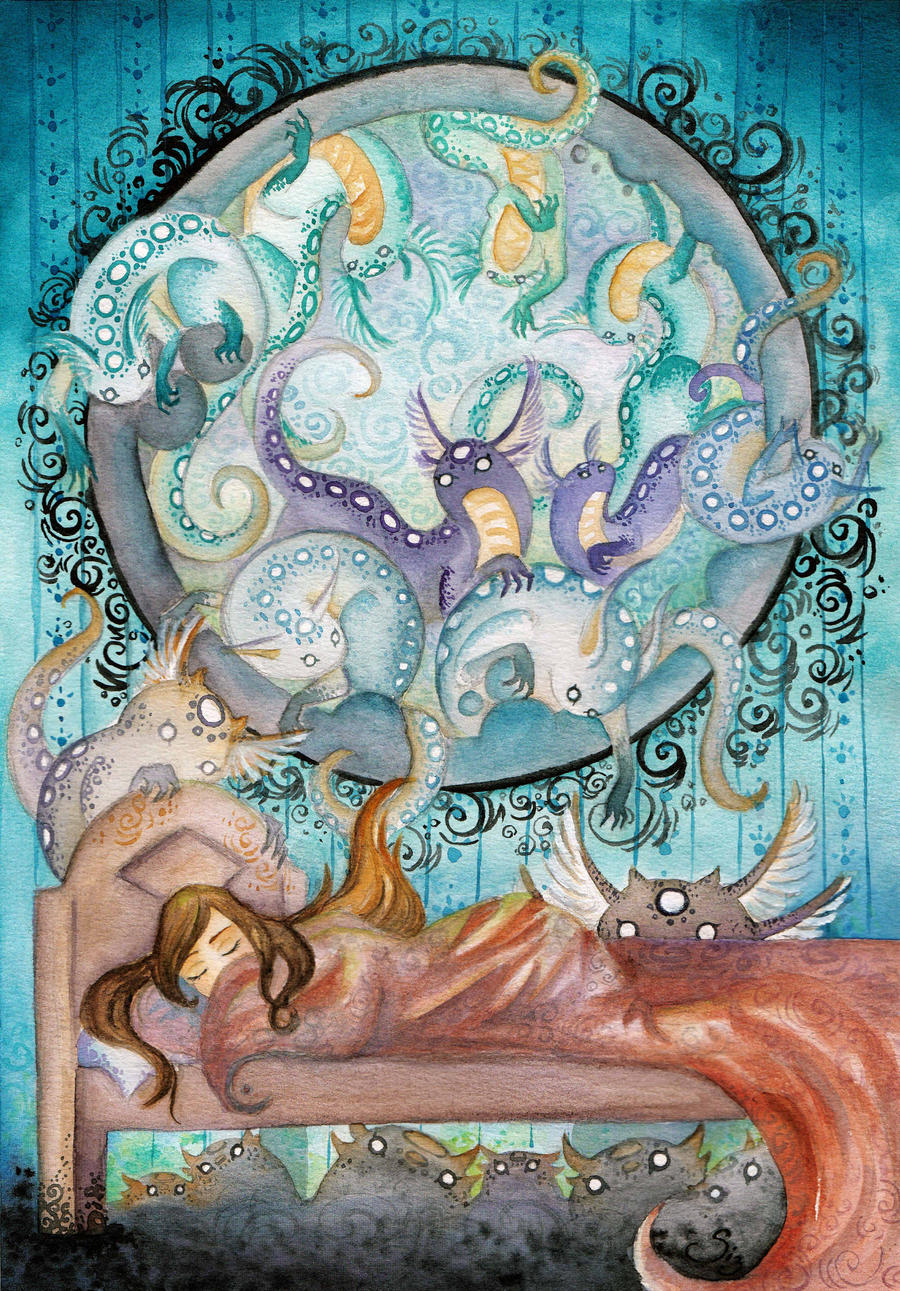
As always, the first step is the idea sketch. This lil' critter was inspired by a couple of illustrations I did about a year ago.
And the inspirational illustrations~
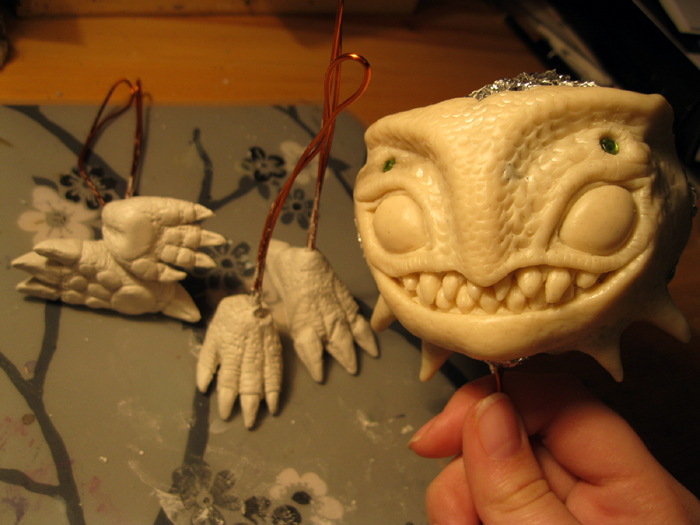
The head is made out of polymer clay 'Cernit' and the feet + horns are made out of air dry modelling clay 'Das'. Used copper wires+folium as base for both the head and feet.
Oh! And to get all the lil' curves and details, I got to try out some dental tools from my awesomeness classmate. :D
The head has been baked+added horns. I didn't do the horns from polymer clay because... Well, that stuff is damn expensive... Even tho the the air dry clay isnt as durable if it should somehow magically drop on the floor...
Painted the head and feet with acrylics, let it dry and tried to build up his body with copper wires.
Added some batting and just rolled over some white thread to keep it in place.
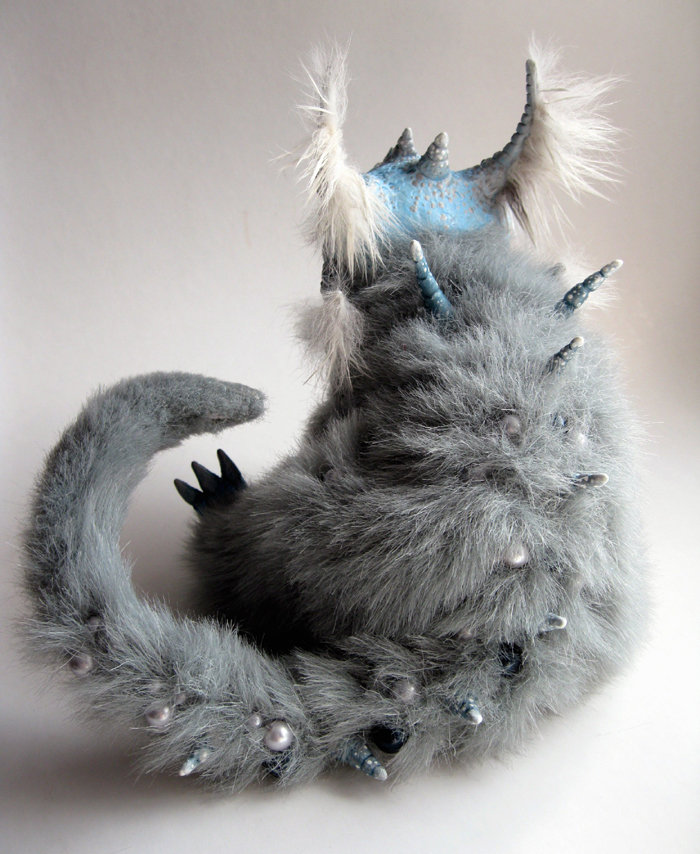
The first pice of fake fur (obviously). x)
Since I had no idea what pattern this thing is going to need, I improvised... Just cut out a rectangular pice and tried fitting it on the body, hand stitched every edge in place.
And did the same with limbs.
Cut the fur shorter around the paws and the tip of the tail. Also glued together the open edges with paws with hot glue and painted his eyes~ :)
Now this is one strange thing... I wanted to do something like spikes on the critters back and how the heck should I connect them? I can't hot glue them on... They would break off eventually. And I can't sew through the clay... xDD So... Did sth like this. Twisted together from copper wire, sculpted the spikes on them and then painted with acrylics + varnish.
Oh! Oh! And you can see the two main tools I used for sculpting the whole time. ^^
Finally sewed on the spikes and lots of plastic beads. :)
And now, that everything was done, it's photo spamming time! ;)
Want to see some more?
You can see this lil' critters 'adventure' walk in the park fb album if you clik on the pic.
CLICK IT!